一、登录防火墙 并进行简单配置
 任务目的
任务目的登录防火墙,并初始化防火墙基本功能。
背景描述作为公司的网络管理员,你希望在机房对防火墙进行初始配置后,以后可以通过Web方式对防火墙进行远程配置和管理,因此需要对其进行初始的基本设置。
项目拓扑 任务设备
任务设备EG2000K防火墙(1台)、主机(1台)、直连线(1条)。
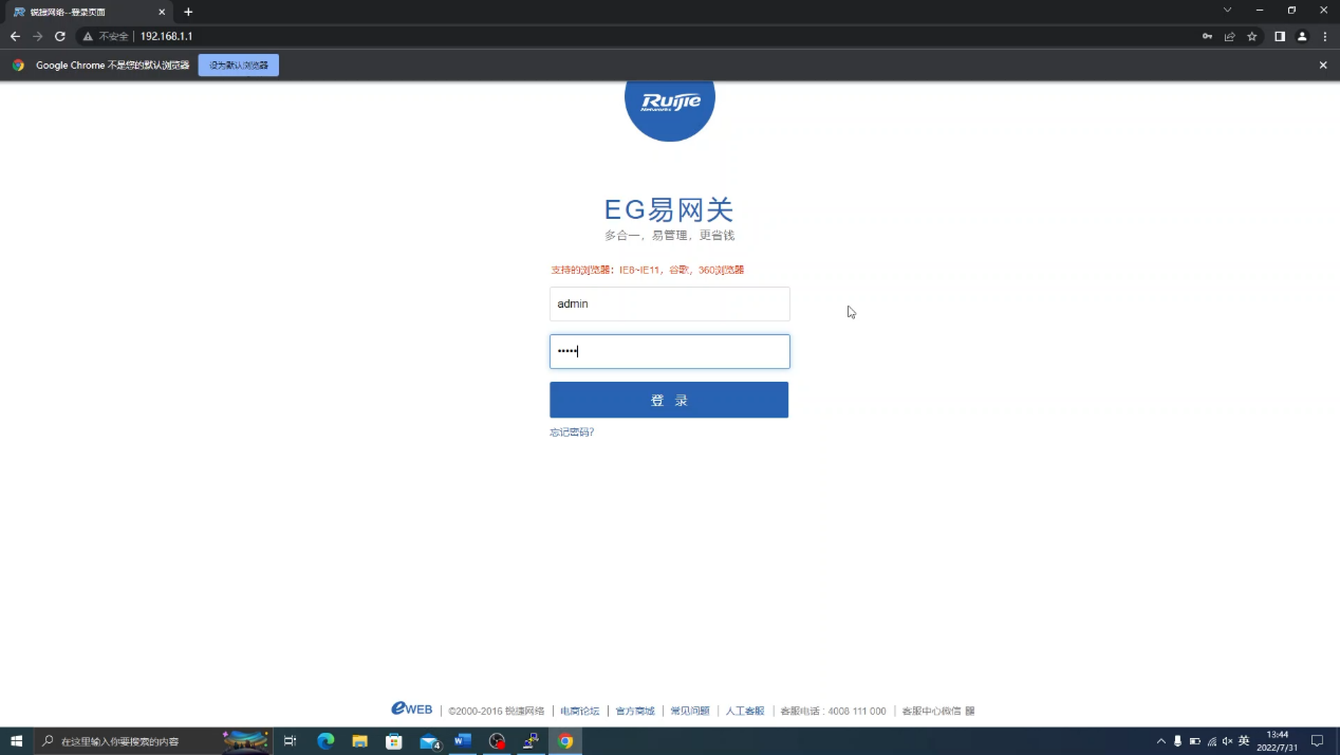
任务步骤1连接防火墙和主机后访问192.168.1.1,使用默认用户名admin、密码admin登录防火墙,如图5-9所示。
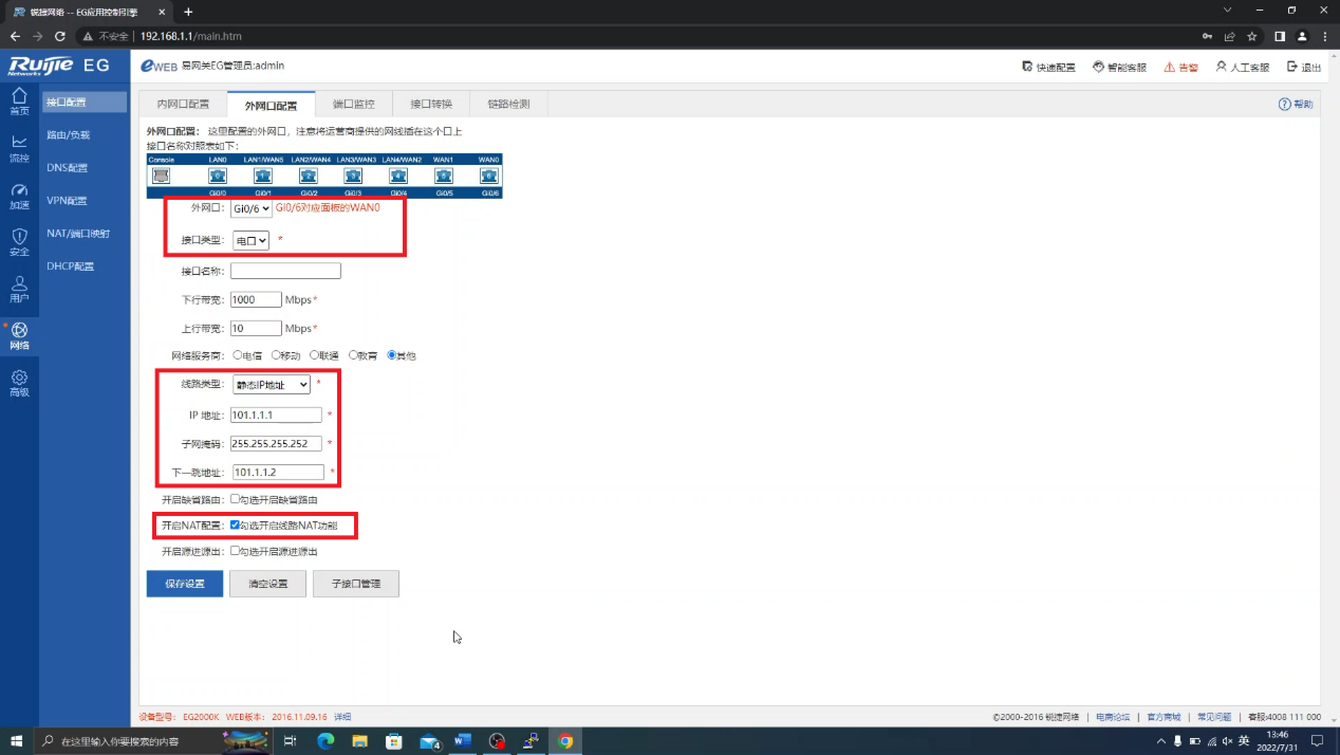
2选择网络→端口配置→外网口配置,如图5-10所示。

3配置链接到外网的接口,如图5-11所示。
4这时防火墙已经初始化完成,可以正常连接互联网了。
二、审计所有用户在工作日浏览web情况
任务名称使用防火墙实现安全的访问控制。
任务目的利用防火墙的安全策略实现严格的流量审计以及流量调控。
背景描述某企业网络的出口使用了一台防火墙作为接入Internet的设备,现在需要使用防火墙的安全策略实现严格的审计,在工作日期间审计所有用户在Web浏览的情况,并进行流量负载均衡。
需求分析企业网络需要对内部网络到达Internet的流量进行审计,防火墙的安全审计和流控可以满足这个需求,实现内部网络到Internet的审计。
任务拓扑 任务设备
任务设备防火墙连接到Internet的链路、防火墙1台、PC1台。
任务原理流控以及流量审计是防火墙的基础功能,这个功能可以不同的流量按需分配,比如分配给工作软件更多的流量,审计则能给企业提供对于风险网站以及常规网站的浏览记录。
任务步骤1选择流控→流控策略,如图5-13所示。
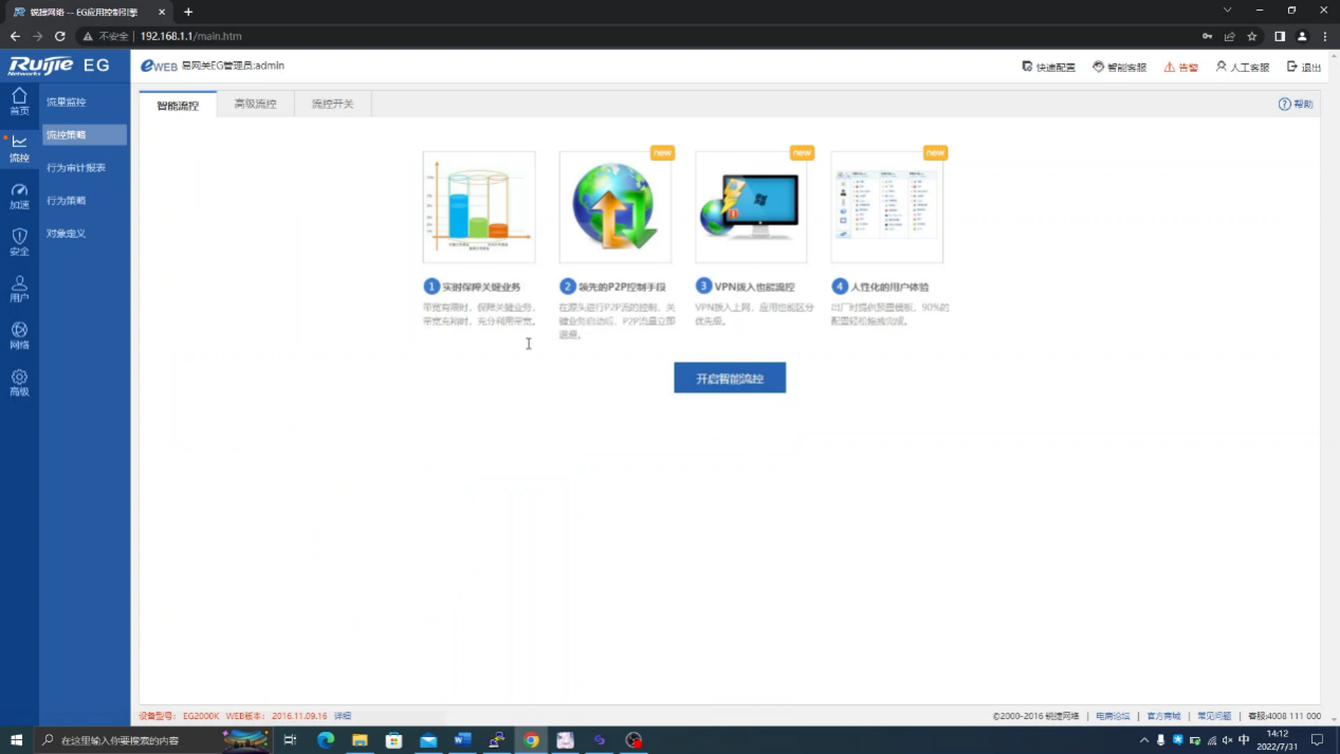
2开启智能流控,如图5-14所示。
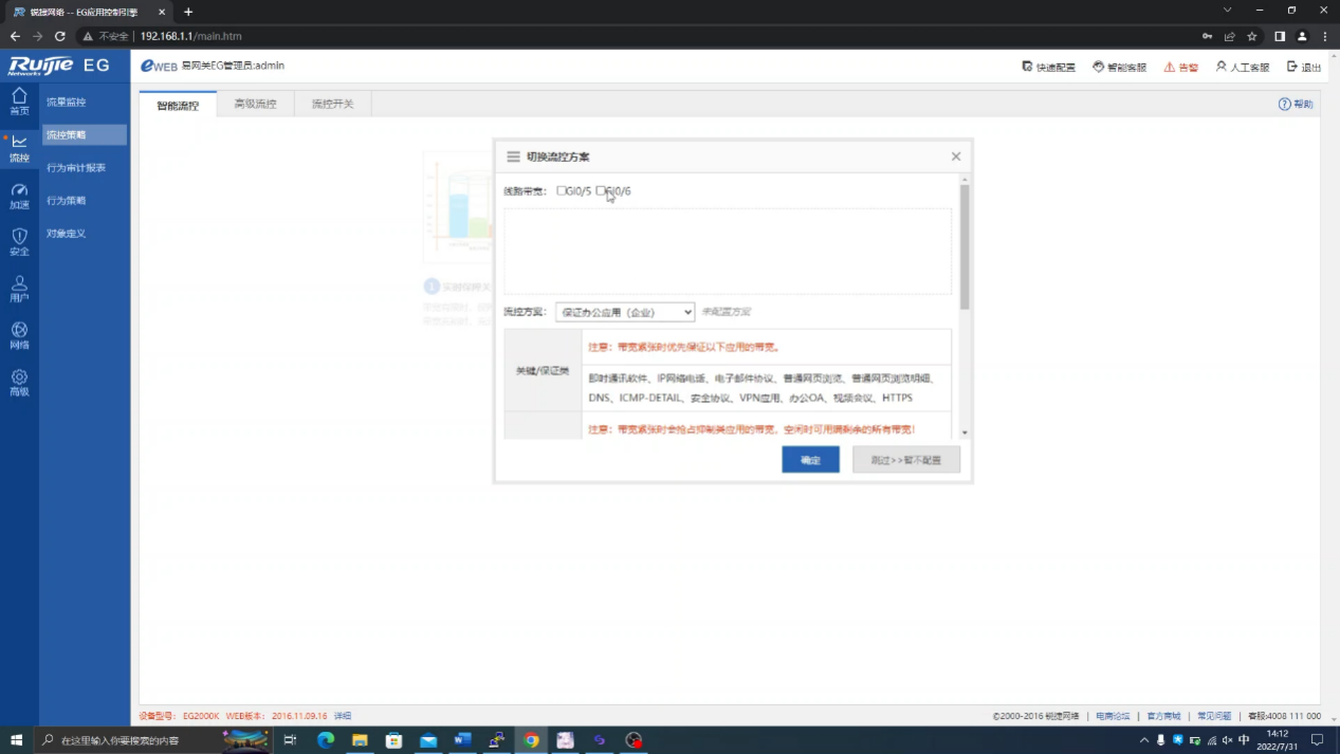
3选择出口,并单击“确定”按钮,如图5-15所示。

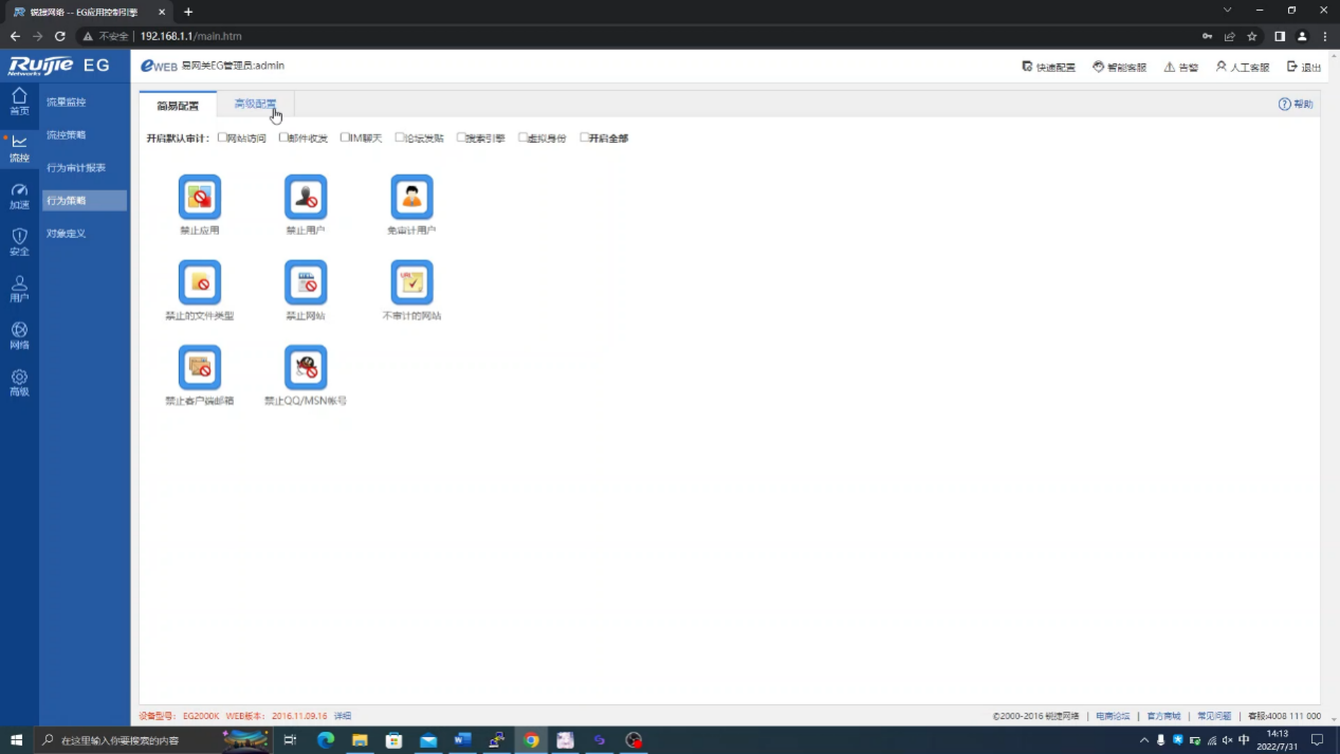
4单击行为策略中的高级配置,如图5-16所示。
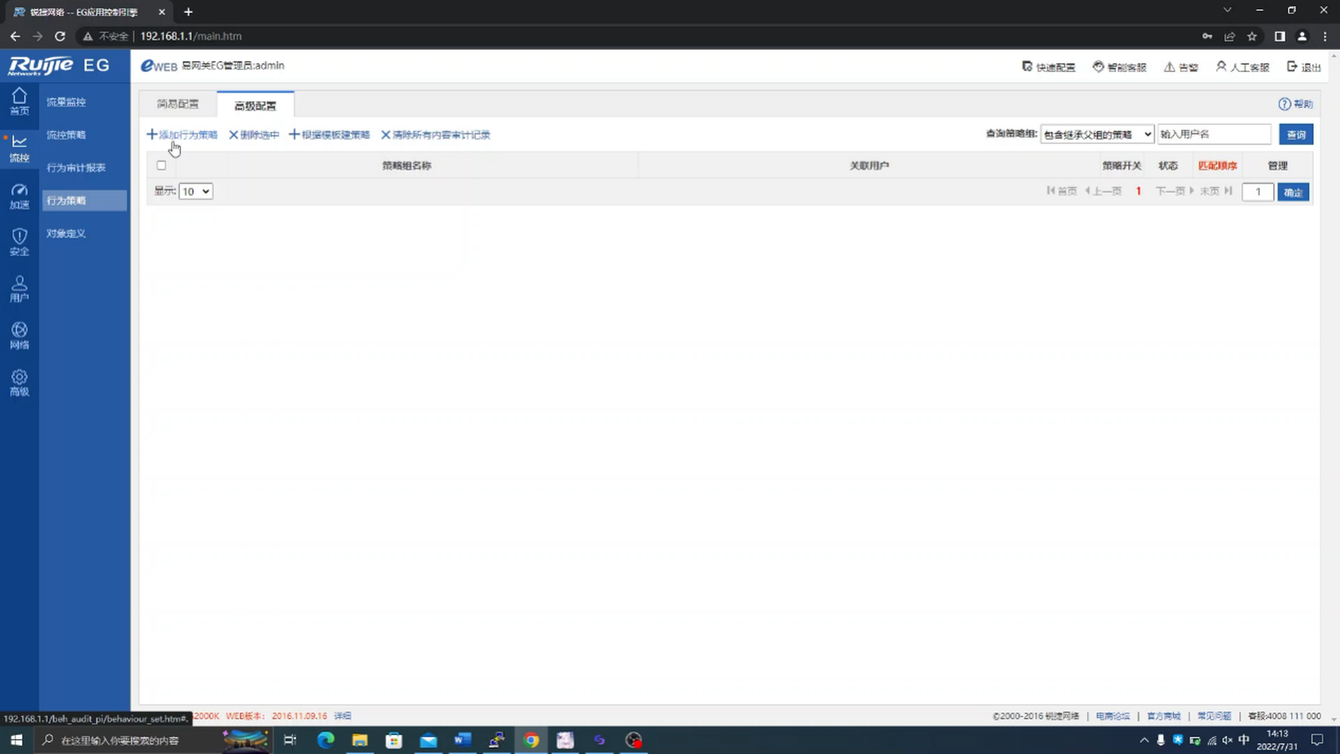
5单击“添加行为策略”选项,如图5-17所示。
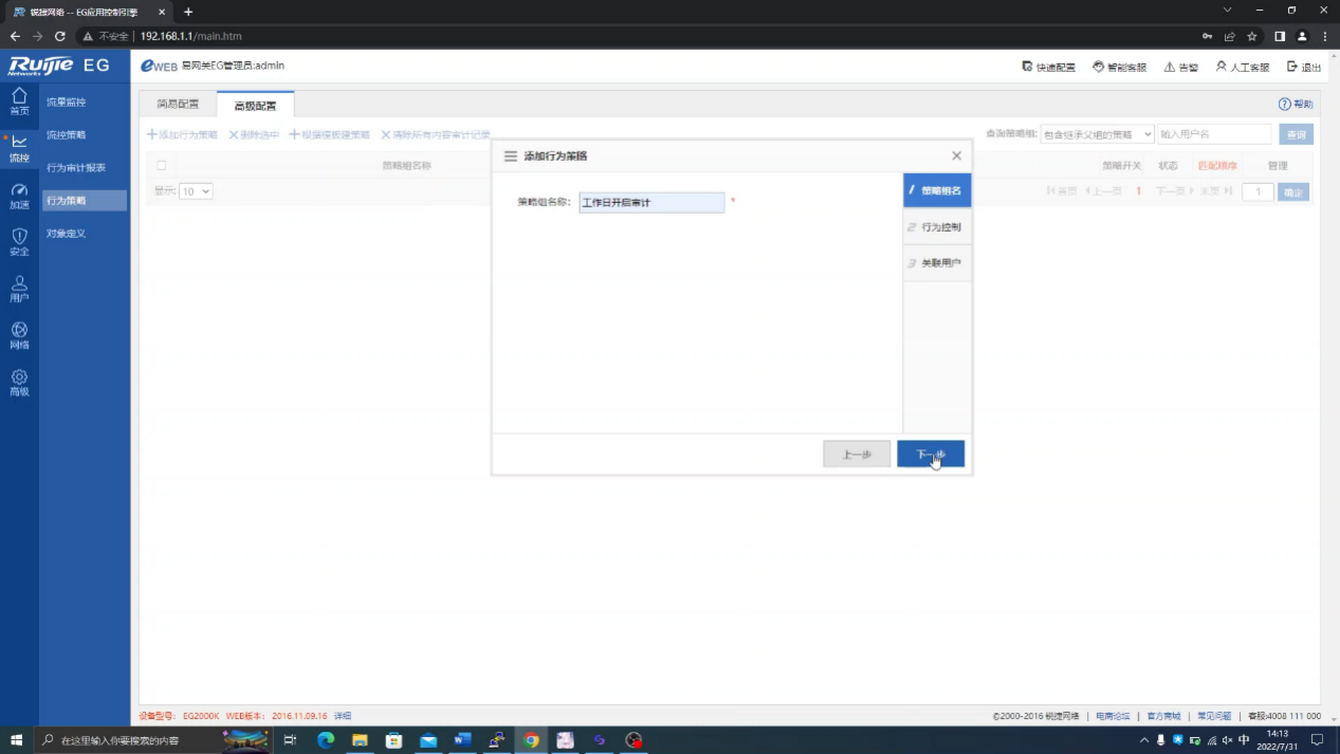
6填写策略名,如图5-18所示。
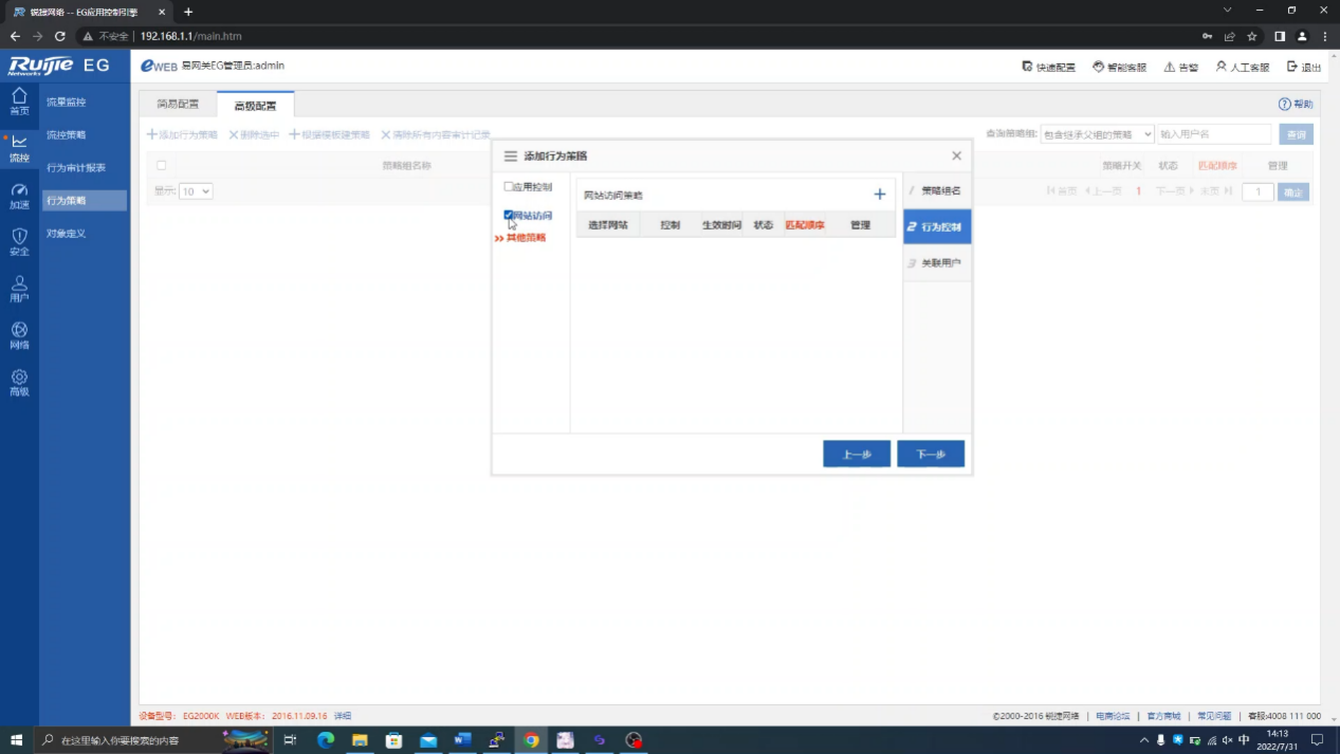
7单击“下一步”按钮后,勾选“网站访问”,如图5-19所示。
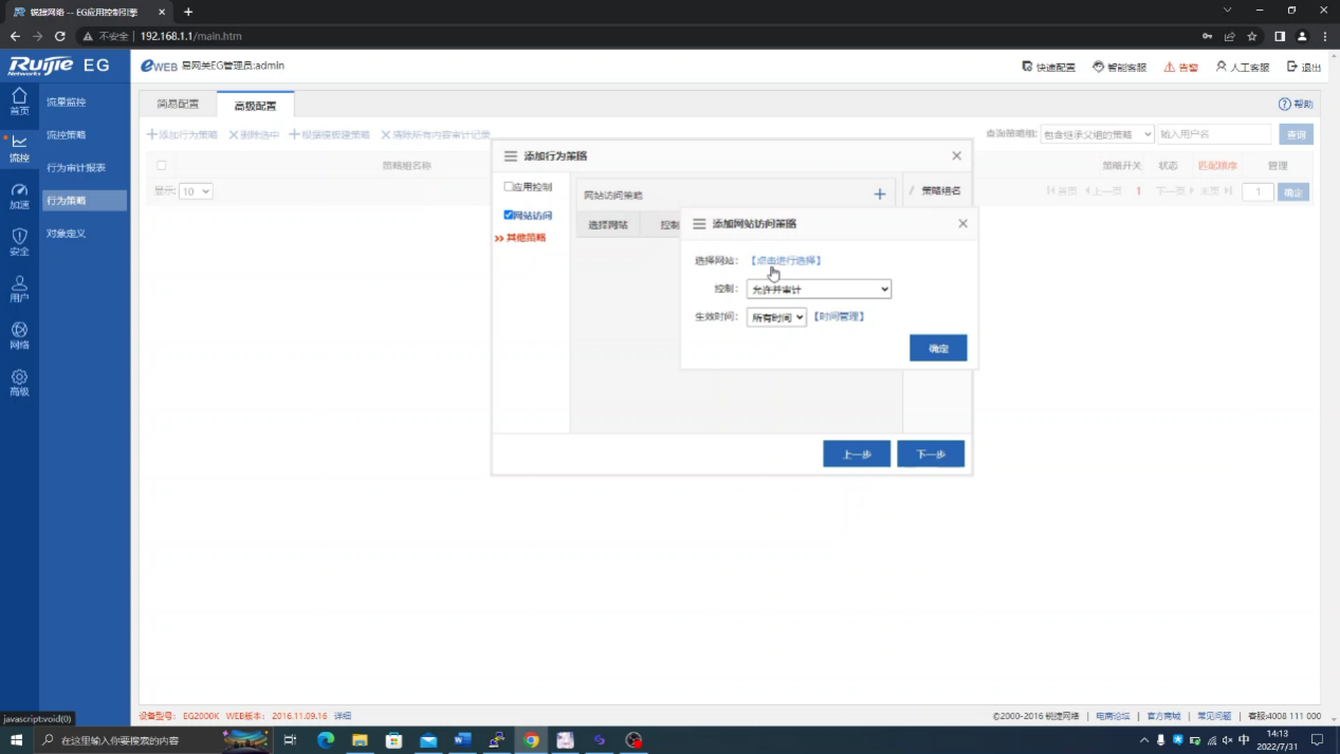
8单击右上角的加号,然后单击“点击进行选择”选项,如图5-20所示。
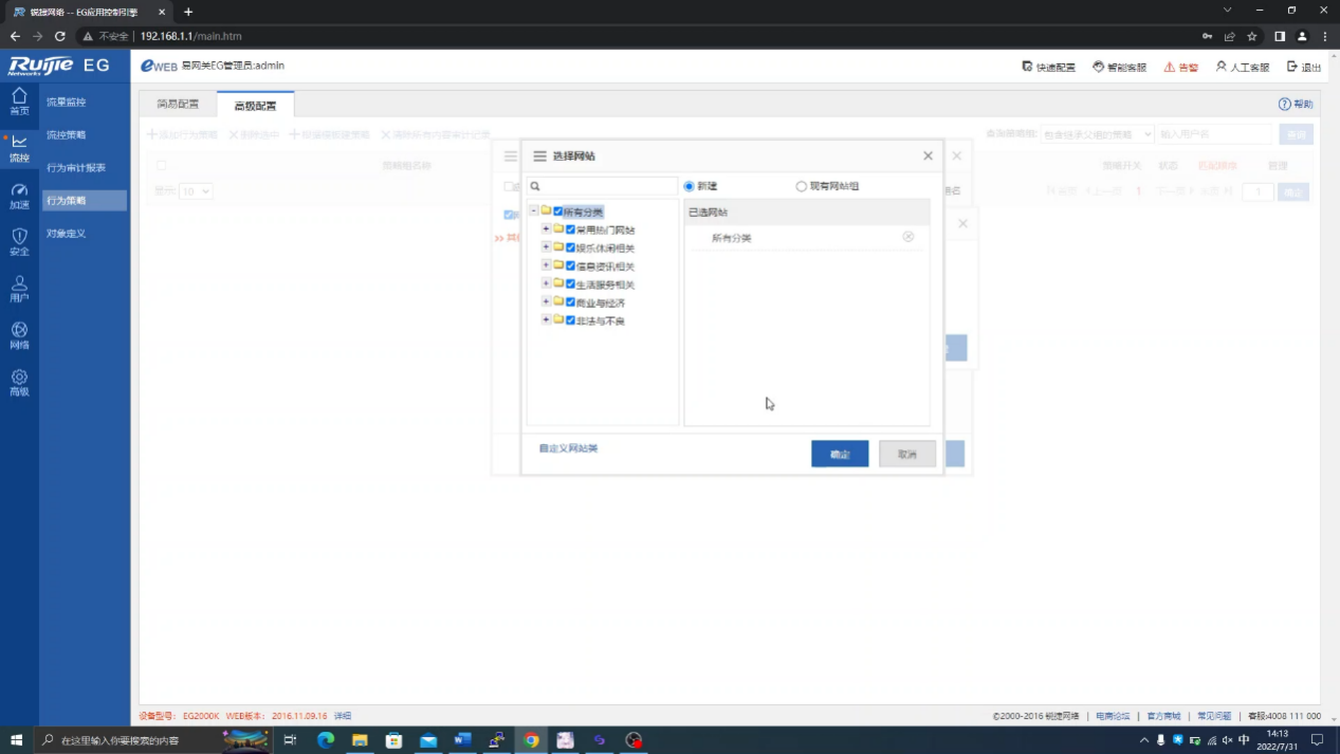
9勾选所有分类,然后单击“确定”按钮,如图5-21所示。
10在条件时间中选择工作日后,单击“确定”按钮,如图5-22所示。

11单击“下一步”按钮后,勾选所有用户,如图5-23所示。

12单击“完成”按钮,如图5-24所示。

三、防ARP攻击和Dos攻击
任务名称防ARP攻击和Dos攻击。
任务目的利用防火墙的抗攻击功能,防止内网ARP以及Dos流量攻击等攻击。
背景描述某公司使用防火墙作为网络出口设备连接到Internet,并且公司内部有一台对外提供服务的FTP服务器。最近网络管理员发现Internet中有人向FTP服务器发起Dos攻击和ARP攻击,消耗了服务器的系统资源。
需求分析要防止DoS和ARP攻击,可以使用防火墙的抗攻击功能。
任务拓扑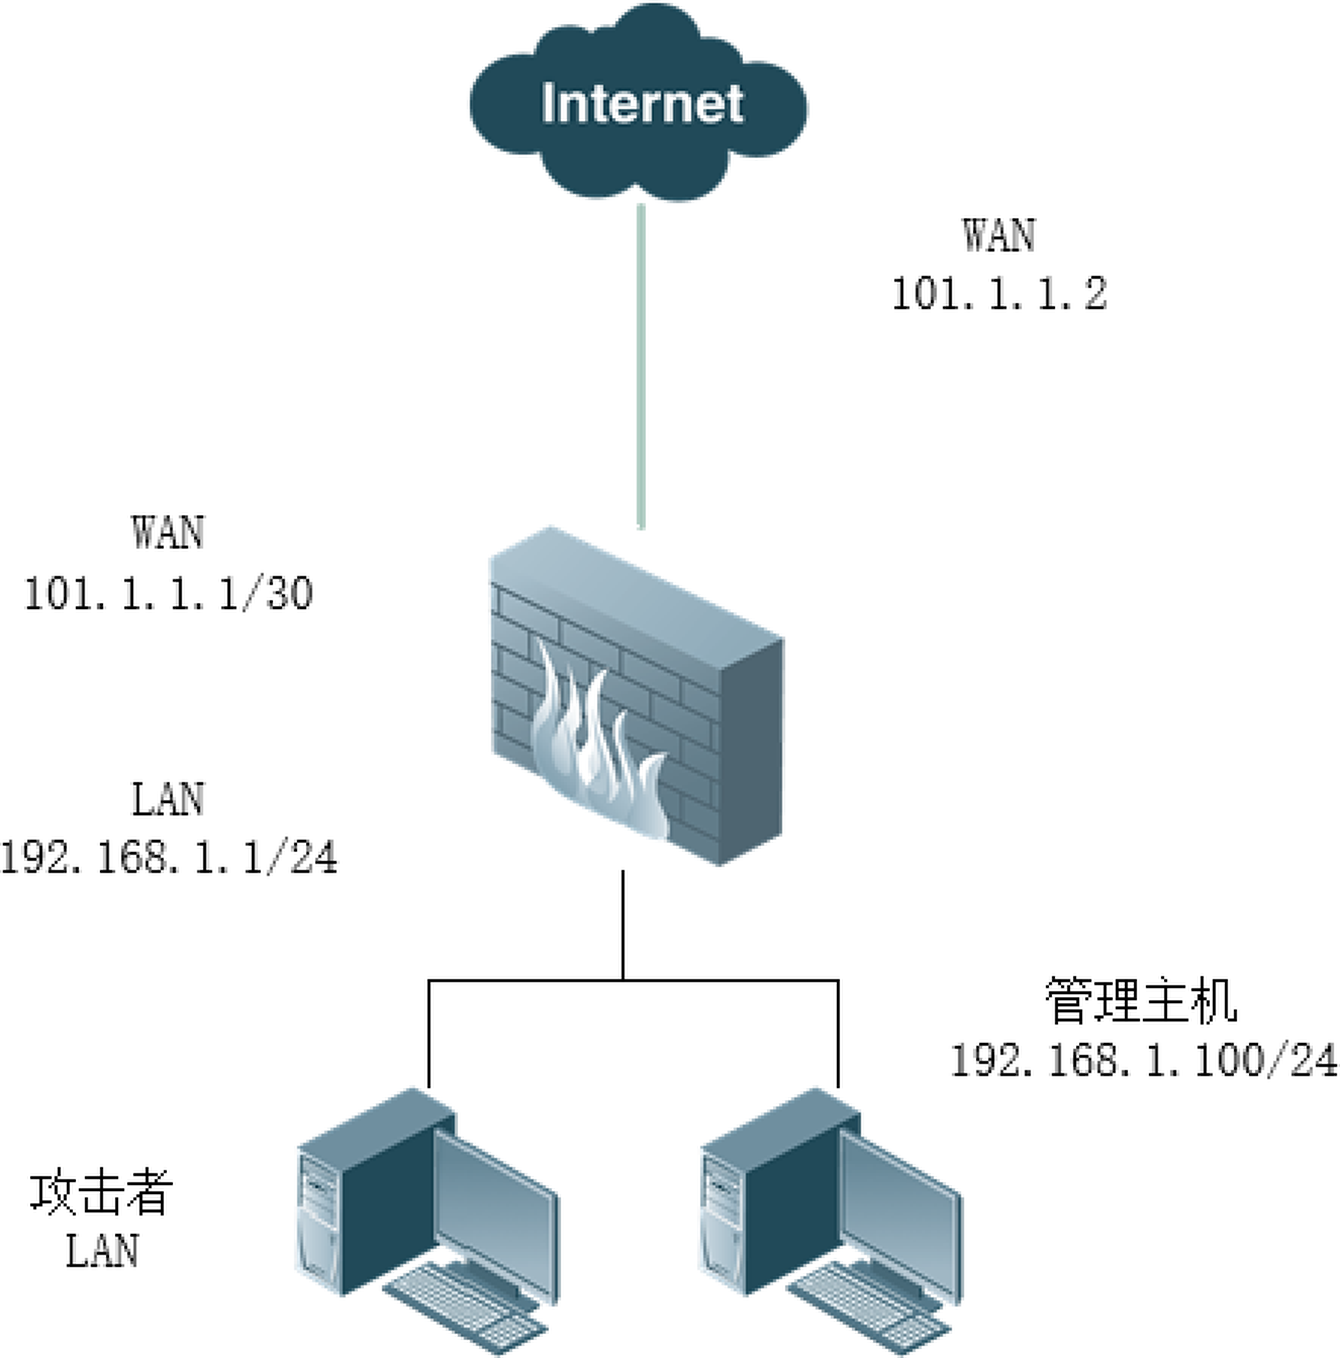 任务设备
任务设备防火墙1台、PC2台。
任务原理通常情况下在内网中充斥着攻击行为,无论是有意的还是无意的。开启防火墙的防攻击就可以避免很大一部分的攻击。
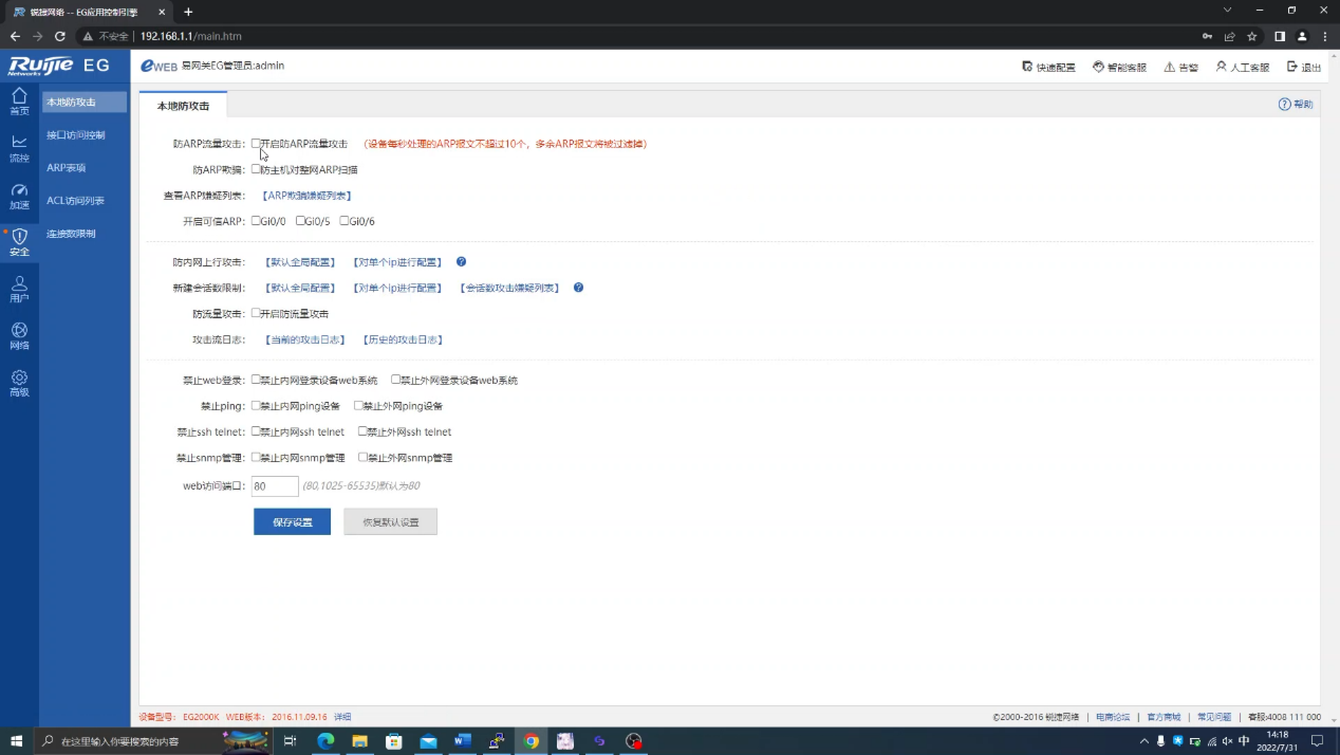
任务步骤1打开安全→本地防攻击,如图5-26所示。
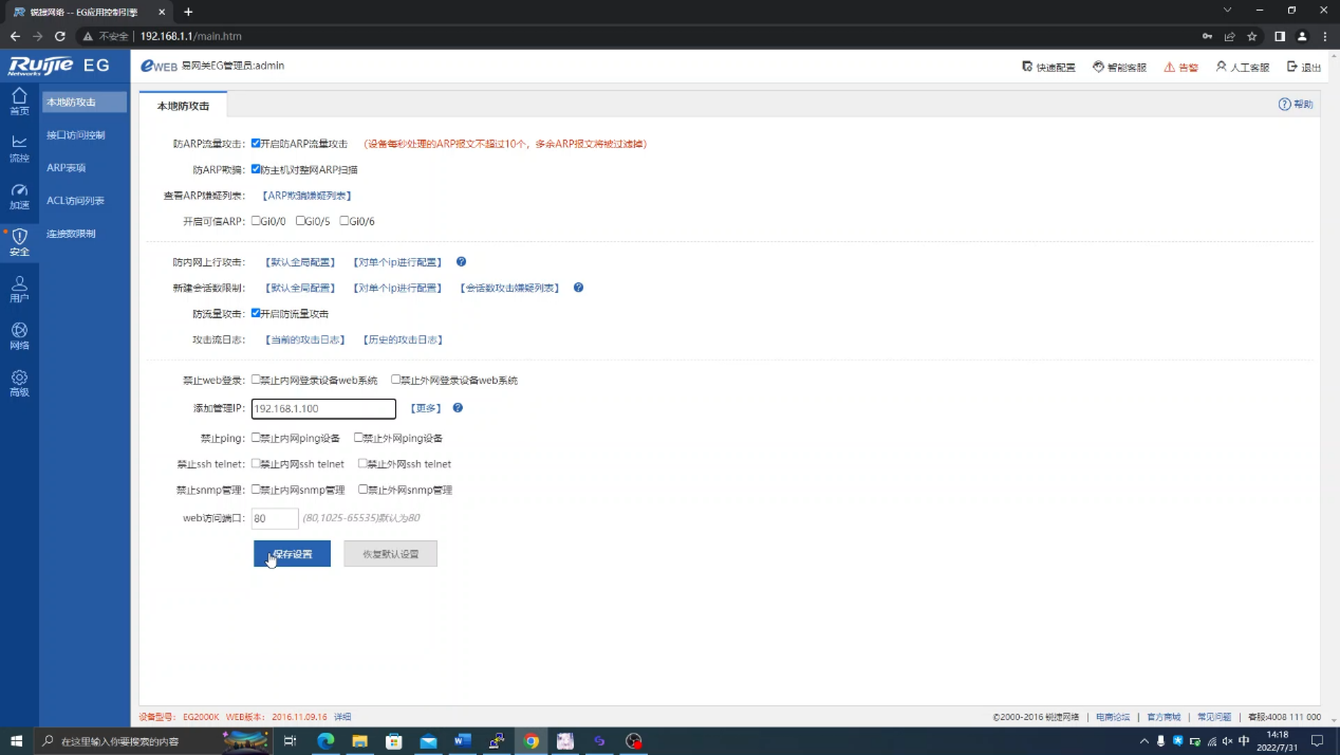
2打开防御功能,如图5-27所示。

3填写管理员IP地址,如图5-28所示。
 注意事项
注意事项开启攻击防御之后,管理员IP地址将会固定,一定要作好记录。
四、实现基于IP不同网段的负载均衡
任务名称实现基于IP不同网段的负载均衡。
任务目的将管理部门分流到一个独立的出口,实现负载均衡。
背景描述张三在某个企业担任网络管理员,公司购置了一条新的专线,他要为公司做一个基于网段的负载均衡,来充分利用两条向外的宽带。
需求分析客户根据网段将网络分配到不同的出口。
任务拓扑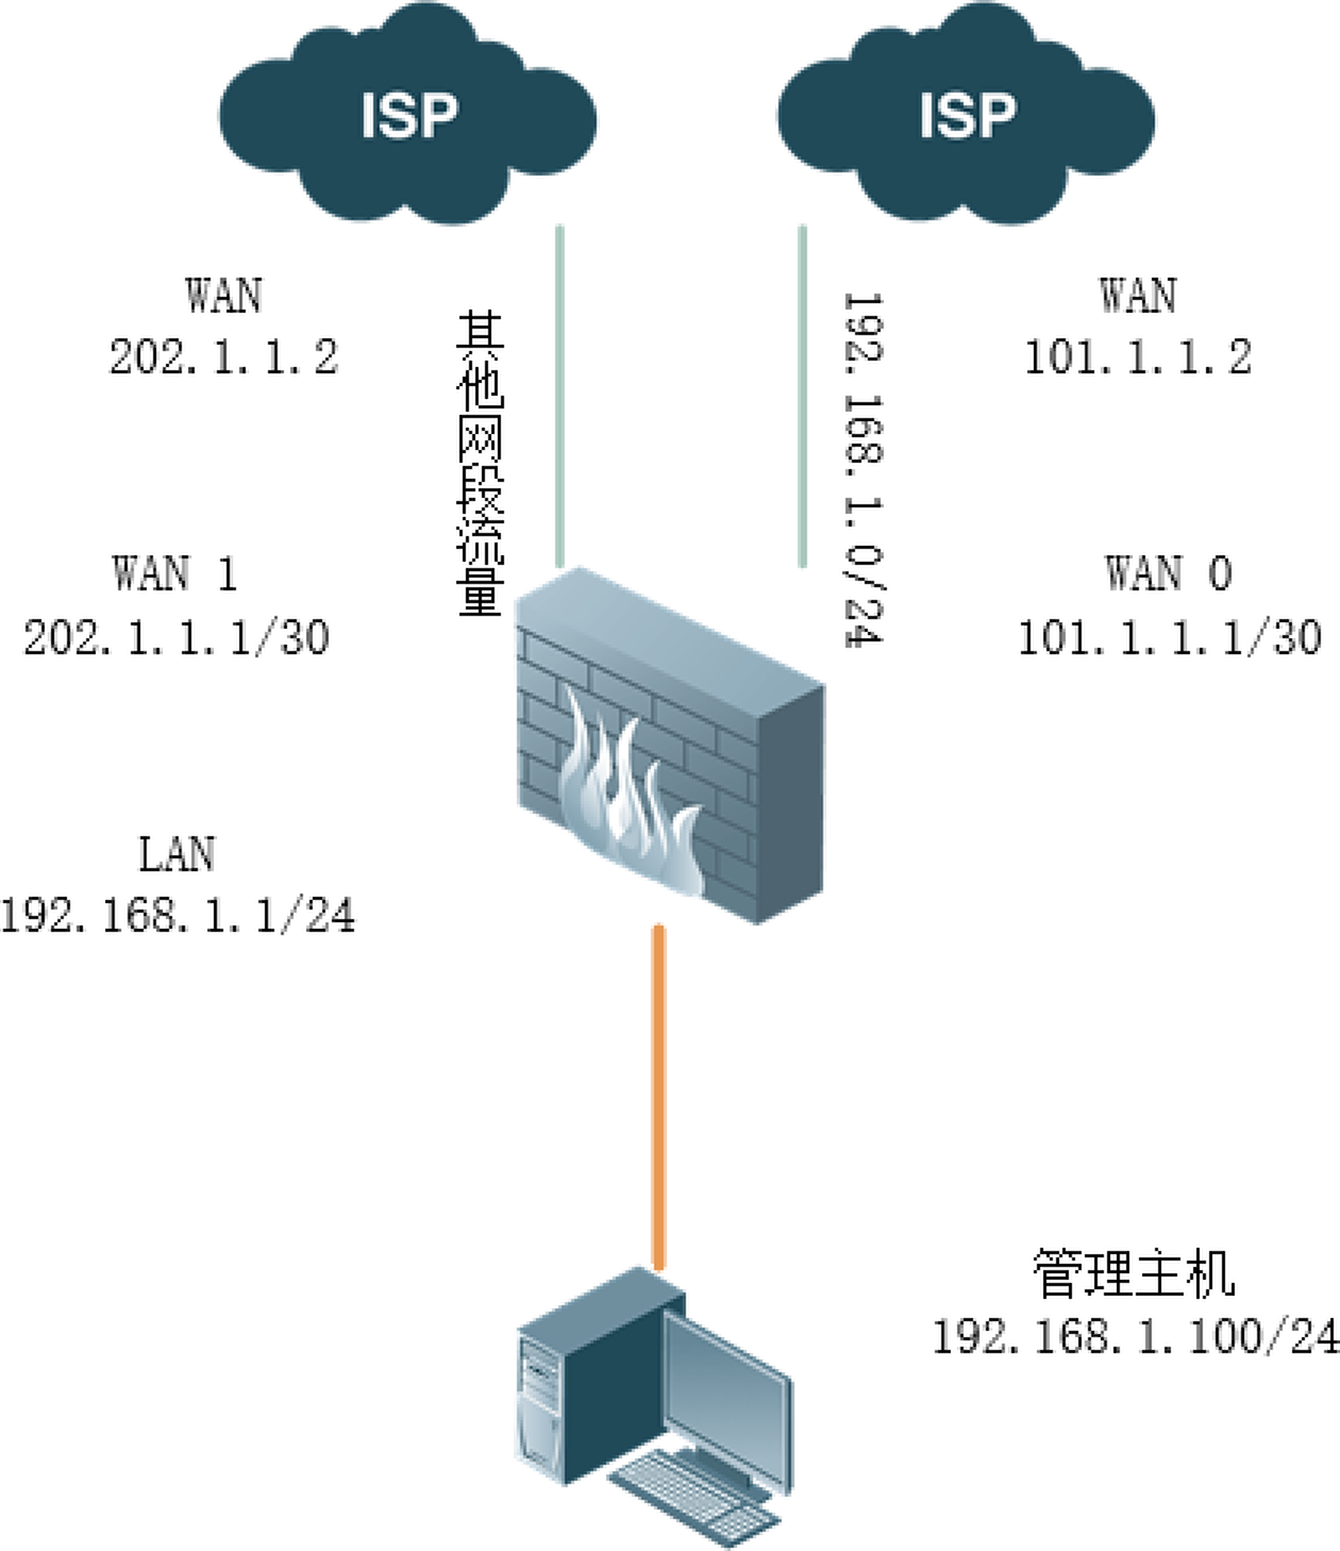 任务设备
任务设备防火墙1台、PC1台、两条出口。
任务原理防火墙继承了ACL以及策略路由等功能,可以使用策略路由将不同网段的流量分流向不同的地方。
任务步骤1选择网络→路由/负载→策略路由,如图5-30所示。

2点击新建ACL列表,并点击添加ACL,如图5-31所示。
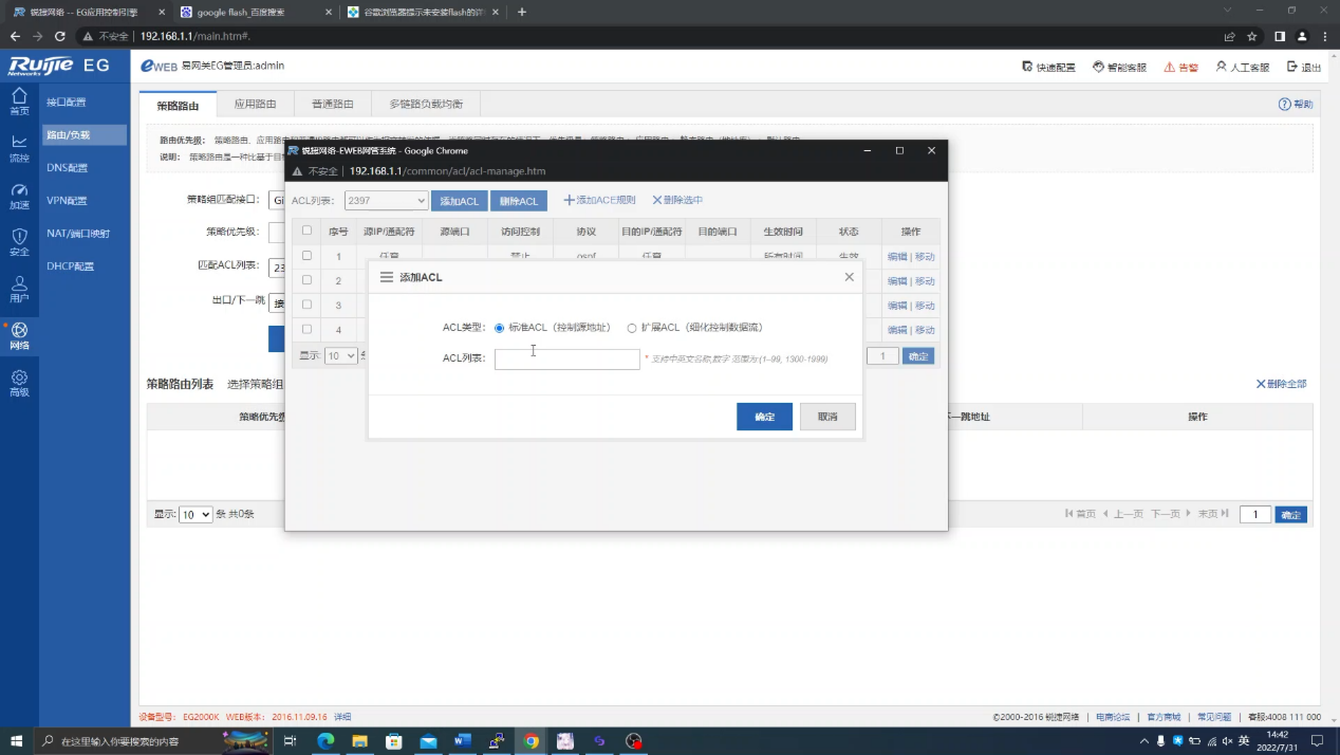
3在“ACL列表”中填入10后,单击“确定”按钮,并点击添加ACE规则,如图5-32所示。

4选择掩码设置,并填入IP地址和掩码,如图5-33所示。

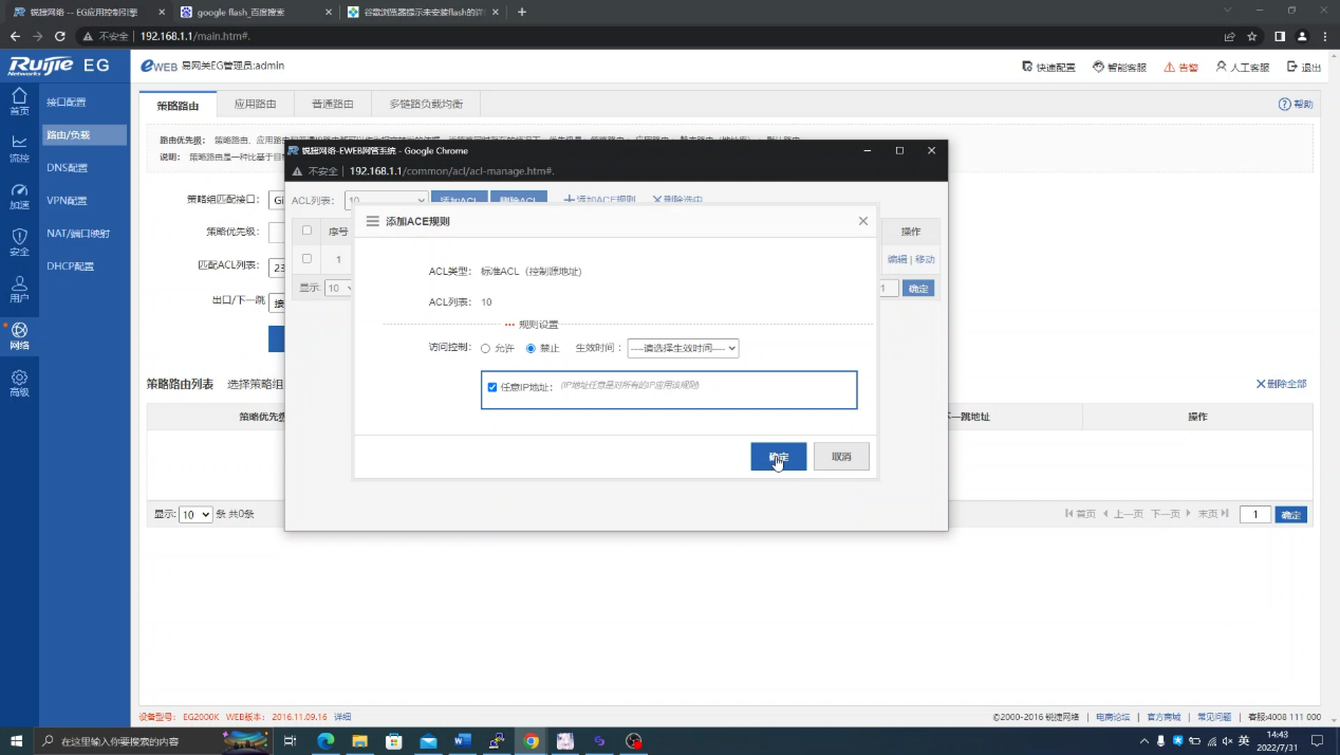
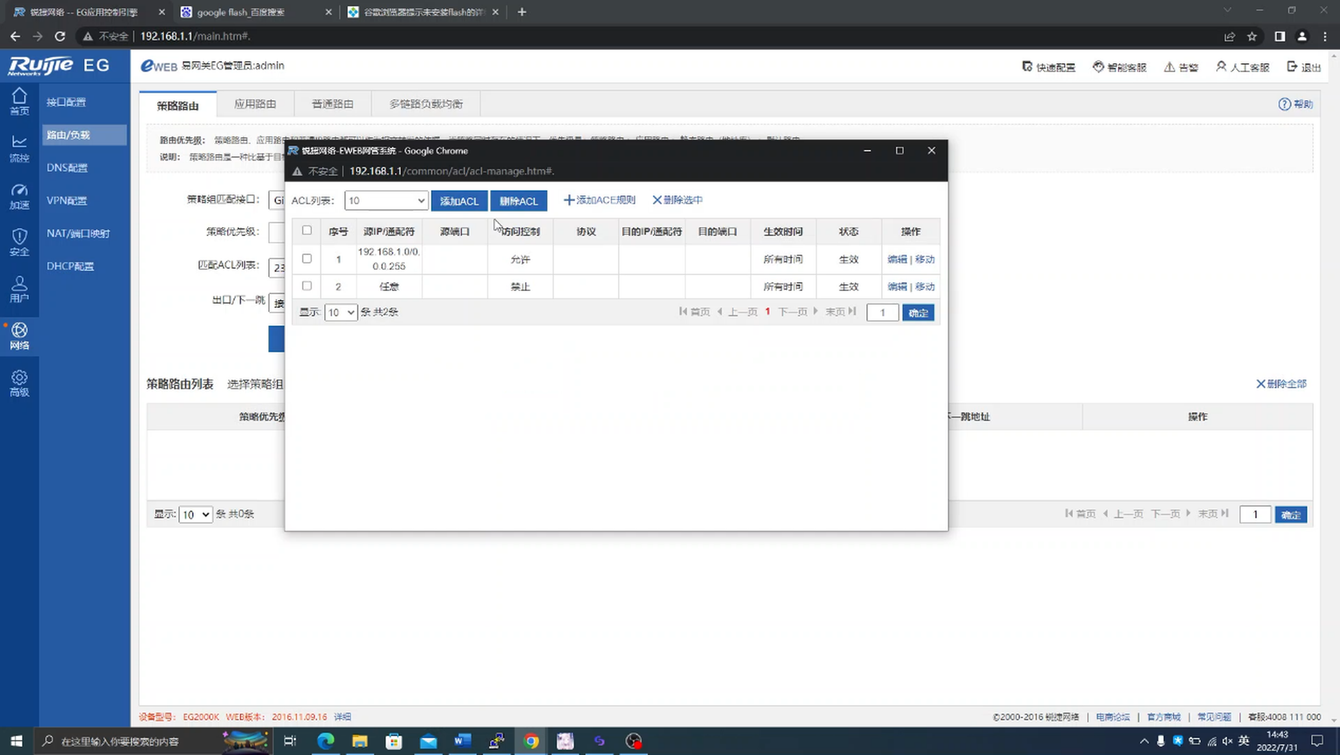
5添加禁止其余所有网段访问,如图5-34、图5-35所示。
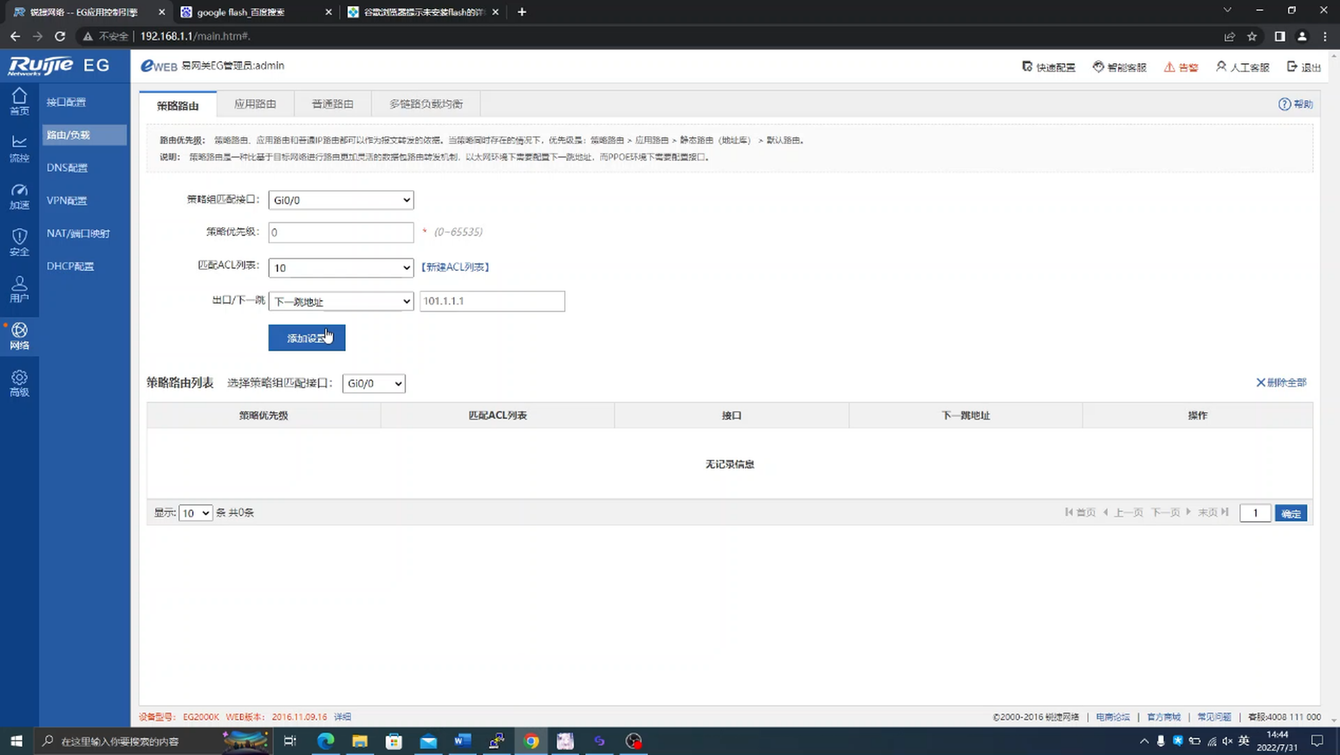
6刷新页面,选择匹配ACL列表10,并指定出口为下一跳地址,填入需求IP,然后点击完成设置,如图5-36所示。
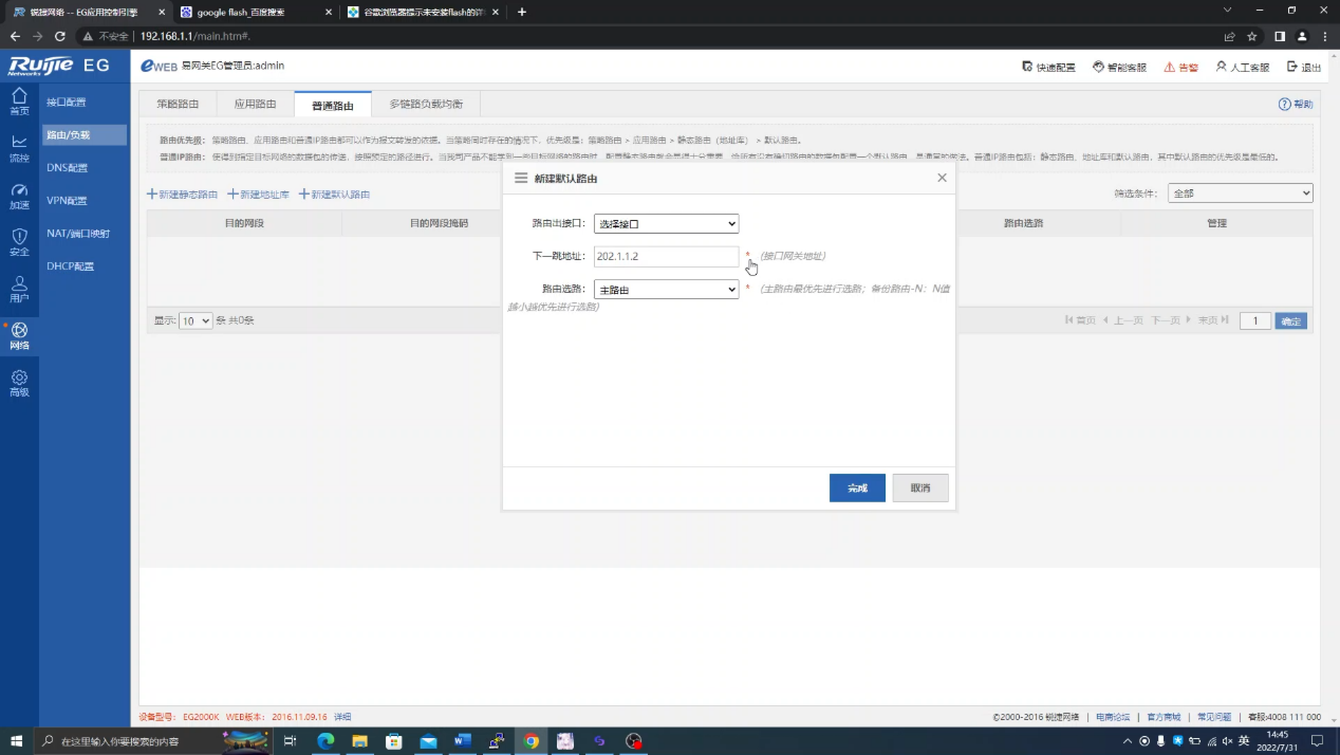
7选择普通路由,如图5-37所示。

8选择添加默认路由,并填入需求的IP地址,点击完成,体验完成效果,如图5-38、图5-39所示。